Help Desk - Screen Recording
When creating a new task or replying to a task the user has the option of recording an application window, browser tab, or their entire screen and attaching it to the task. Recording file attachments must comply with the same file size restriction limits determined by on the current subscription settings and subscription plan limitations. Screen recording are stored in high quality .webm format. A sample screen recording is available by
clicking here.
Not all features may be available to all users. Features and options depend on user permissions and subscription level.
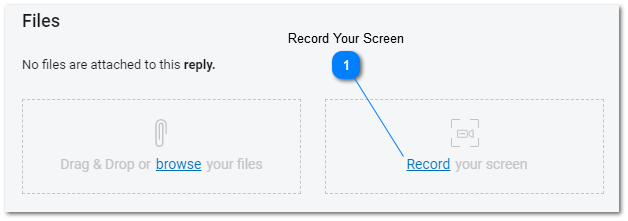
 Record Your ScreenTo initiate the screen recording process, the user must click the Record link and open the Screen Recorder Menu. The Screen recorder menu assists the user in recording , Pausing, Stopping, Canceling and Attaching a screen capture to the currently active task.
|
|
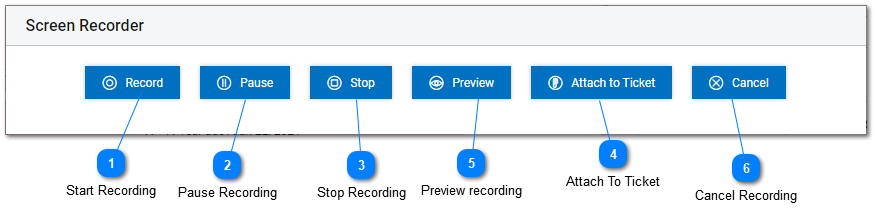
Screen Recorder Menu
Start RecordingThe Record button initiates the recording and displays a Select Recording Source dialog window. For more information about selecting the recording source see Select Recording Source below. Once the user clicks the Record button the button caption and color change to show that recording is active.
|
|
 Pause RecordingClick on the pause recording button to temporarily pause the recording. Once the user clicks the Pause button the button color changes to show that pause recording is active.
|
|
 Stop RecordingClick on the stop recording button to stop the recording. Once the user clicks the stop button the button color changes to show that the recording has been stopped.
|
|
 Attach To TicketAttach to task will attach the file to the currently active task. And entry will be created under the section displaying the files that are attached to the task.
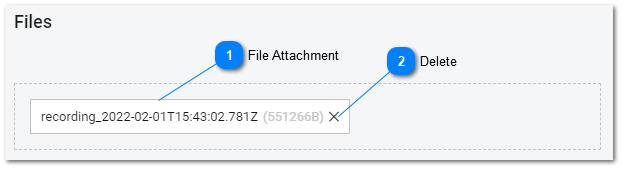
File AttachmentThe attached recording displayed in the active task's file attachment area.
| |
DeleteDelete the attached recording file by clicking on the "X" next to the file name.
| |
|
|
 Preview recordingThe preview recording button expands the screen recording window to include a recording preview area. The recording preview area allows the user to review the captured screen recording before attaching it to the help desk task, re-recording it, or canceling recording.
.
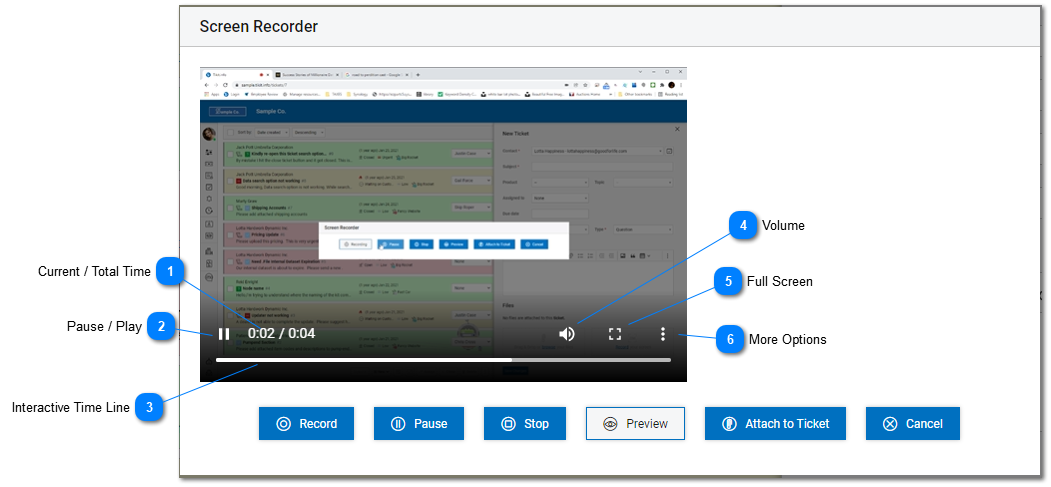 Current / Total TimeThe time display shows the current playback position and total video time.
| |
Pause / PlayThe play and pause toggle allows the user to plya back and pause the replay of the screen capture video.
| |
Interactive Time LineThe interactive timeline displays the current play back progress on the time line
| |
VolumeAdjust the playback volume by clicking on the speaker icon.
| |
Full ScreenThe full screen mode button allow the user to enter full screen mode during video playback.
| |
 More OptionsThe more options menu displays additional playback options.
| |
|
|
Cancel RecordingTo cancel the recording and not attach it to the task click on the cancel button. Clicking the cancel button will close the screen recording dialog.
|
|
Select Recording Source
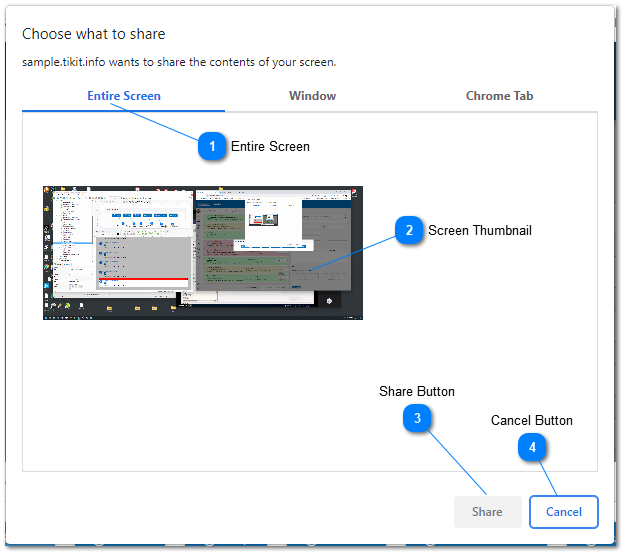
The select recording source dialog is displayed by the web browser and allows the user to select what will be recorded. The user has the option of selecting the entire screen, a window or browser tab.
Select Recording Source - Full Screen
To select the entire screen for recording click on items 1 , 2 and 3 in sequential order below:
Entire ScreenTo record the full screen, click on the full screen option, then click the Screen thumbnail and the share button.
|
|
Screen ThumbnailPreview of the entire screen that will be recorded previewed in thumbnail format.
|
|
Share ButtonThe share button share the selected screen recording source and initiates the recording.
|
|
Cancel ButtonThe cancel button cancels the sharing of the selected screen recording source and aborts the recording.
|
|
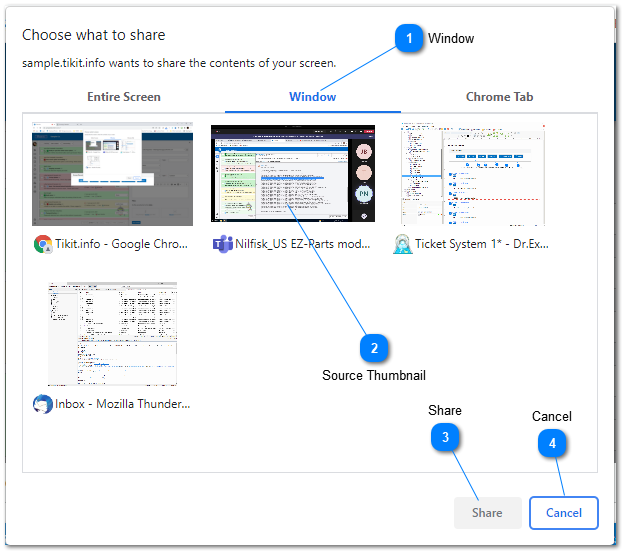
Select Recording Source - Window
To select the entire screen for recording click on items 1 , 2 and 3 in sequential order below:
WindowTo record a specific windows, click on the full screen option, then click the Screen thumbnail and the share button.
|
|
Source ThumbnailPreview of the window that will be recorded, previewed in thumbnail format.
|
|
ShareThe share button share the selected screen recording source and initiates the recording
|
|
CancelThe cancel button cancels the sharing of the selected screen recording source and aborts the recording.
|
|
Sample Recording
The sample screen recording attached below provides a sample of recording and playback quality. To view the sample recording
click here.